Adding Quick Sale buttons
The following steps are only for the new process of adding Quick Sale buttons starting with version 3.100 in the Online Options site.
To quickly add a button for a product
From the new Online Options site, once you have a created and selected a Profile and a Page, you can started adding Quick Sale buttons (QSB). You need to decide where you want to place your button within selected a Page and an optional submenu (See the Submenu topic for more information), then do the following:
-
Log onto your Online Options with permissions.
-
Under the Main hamburger menu, select Sales, then select Quick Sale Buttons. The Quick Sale Button screen displays all the available items listed to the left.
-
Select desired profile from the Profile drop-down. If you need to create a profile, see the Profile steps.
Note: You must have at least one Page created AND selected or you will get a warning. (See the Using Pages topic for more help on that.)
-
Search for your item in the left-hand column using the Search field and Search button or the Supplier, Category, and Store drop-downs to help you narrow down the items. The Code and Description displays for the list of items below.
-
Click and drag the desired item to a cell on the grid to the right. The product's name from the description displays on the cell and sometimes the color selected previously for the other buttons.
-
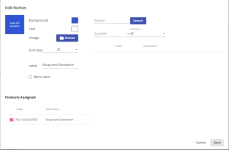
If you want to change anything on this button including the label (AKA Description), select the button then select Edit. (See the Formatting Quick Sale buttons topic for more details.)
Note: You cannot change the price of the item; you need to change that in the Inventory module of your POSExpress of CPS v3.
To format a Quick Sale button after it has been added
Note: You may have to select the Page and submenu under which this button was created if it is a menu item.
-
Select the button and then select Edit.
-
Here you can edit color, add an image, change the label, and edit font size.
-
Use the steps in the Using Pages starting on step 2 for more details on formatting.
Changing a product attached to a button
You can add a button without a product attached, or you may have a button that needs to be updated with a new product. If you have created the button without a product attached to it or need to change the product, you can edit or add the product to the button.
Make sure you are logged on as a user with privileges to create QSB or log on as the Admin. From the page or submenu, where the button is located, do the following:
-
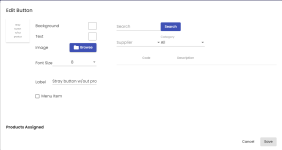
Select the button that needs updated and select Edit. The Edit Button screen displays.
-
Search for the product using the following methods:
-
Type in the Search field, part of all of the item’s code or description as created in Inventory, and click Search or press Enter.
-
If you want to narrow down the products by supplier either before or after your search, click the drop-down arrow of the Supplier field. If you know the first letter of the supplier, enter it and the list will drop to where that letter is first found in the list.
-
If you want to narrow down the products by category, either before or after your search, click the drop-down arrow of the Category field. If you know the first letter of the category, enter it and the list will drop to where that letter is first found in the list..
-
-
When you see the product item to add to this button, select the checkbox to the left of it then click Save.
Note: No need to save here.
To move a button
If you have a button that needs to be on a different space, Page or submenu, you can do the following to move it:
-
Navigate to the button that needs to be moved.
-
Select the button.
-
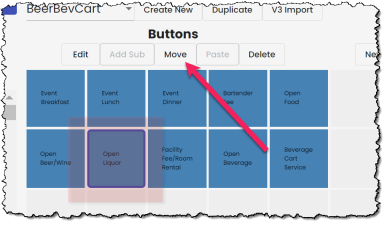
Select the Move button. A quick message displays stating that the button has been copied, then the Move button is dimmed.
-
Navigate to the new Page or submenu where the button is going to be moved to.
-
Select the desired square.
-
Select Paste. The button is pasted in the spot you selected.


